

| Table of Contents|
1. Understanding Exposure
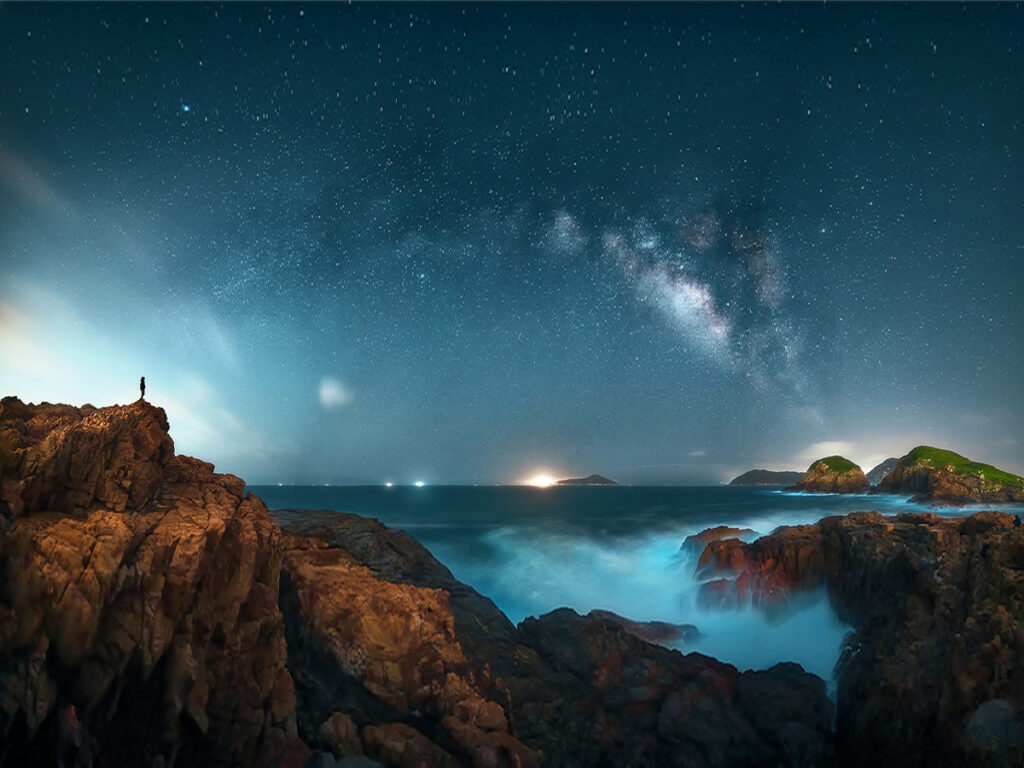
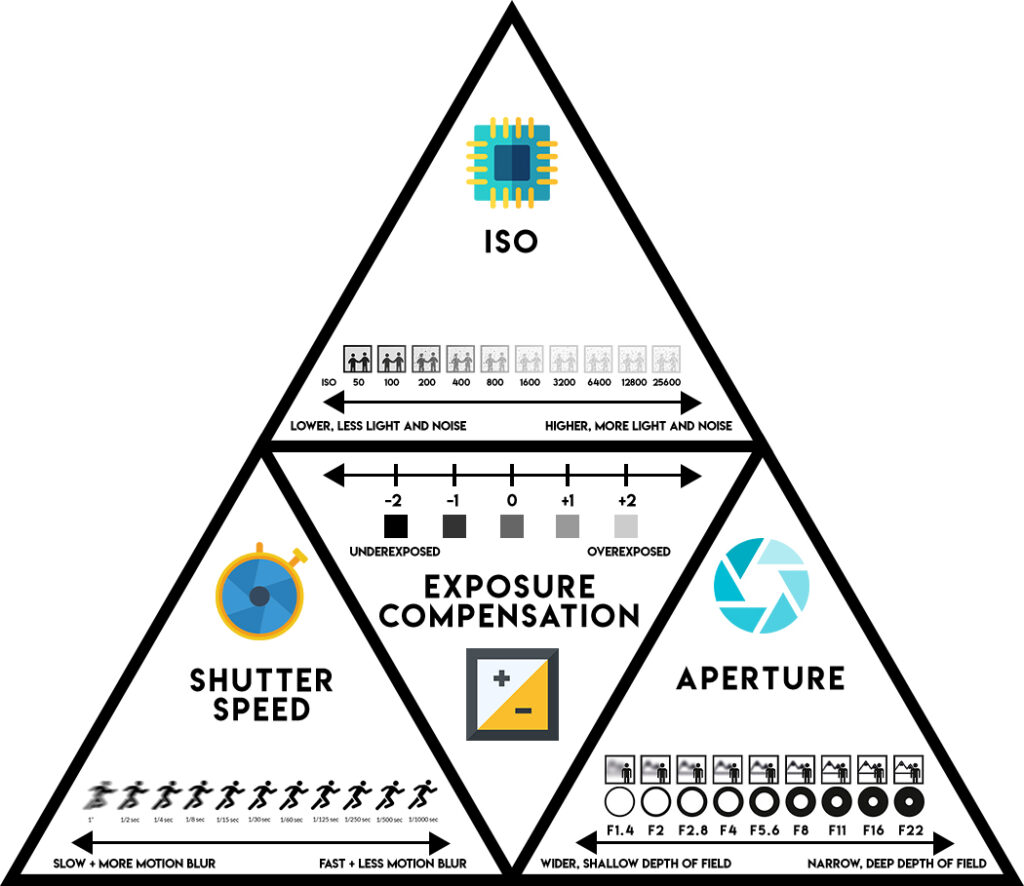
Understanding exposure is a crucial aspect of photography, and it involves the correct balance of aperture, shutter speed, and ISO. These three elements are essential in creating a well-exposed image, and in this beginner’s guide, we will explain what each of them means and how to use them to improve your photography skills.
2. Photography Tips: Understanding Aperture
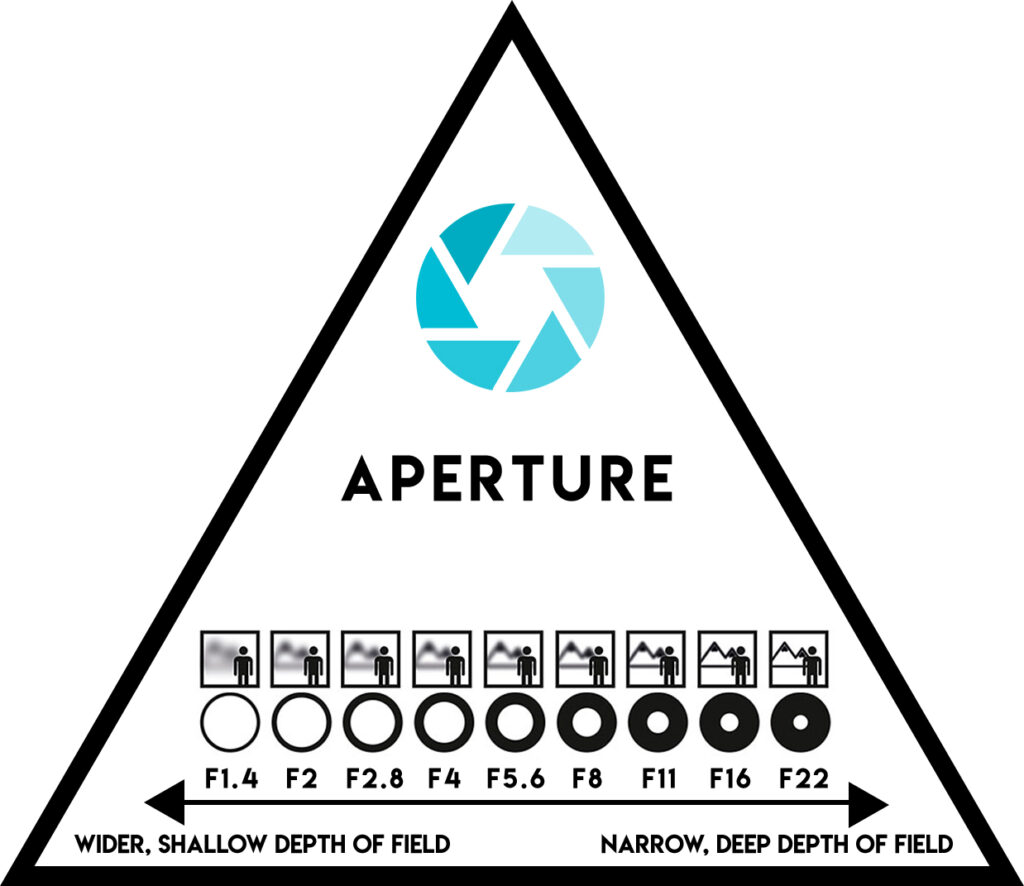
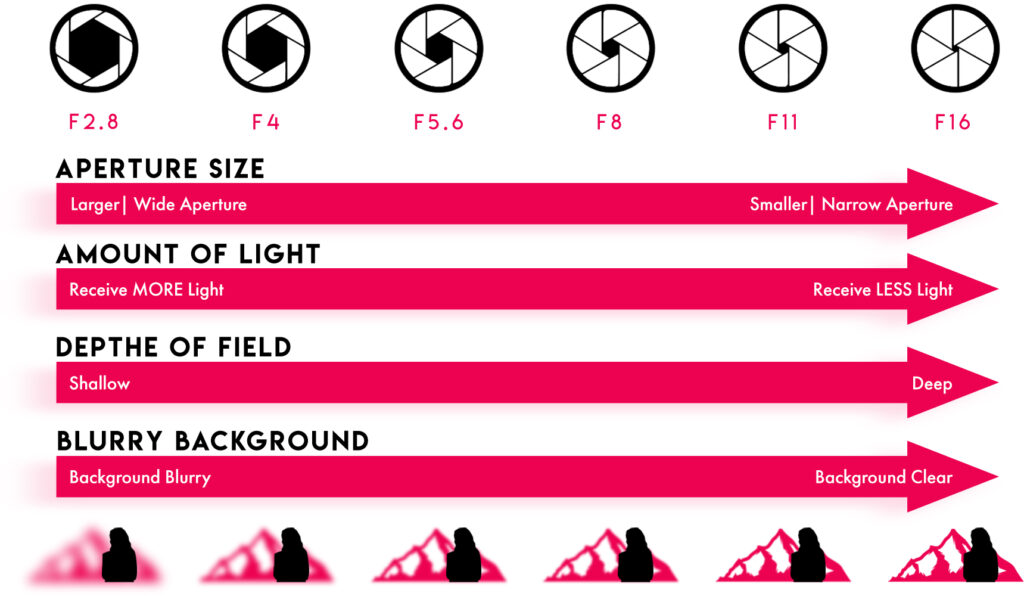
When it comes to photography, understanding the importance of the aperture is crucial. Although it may seem like a complicated concept, the aperture significantly impacts the overall quality of your photos. Choosing the right aperture size can make your images more vivid, rich, and deep.

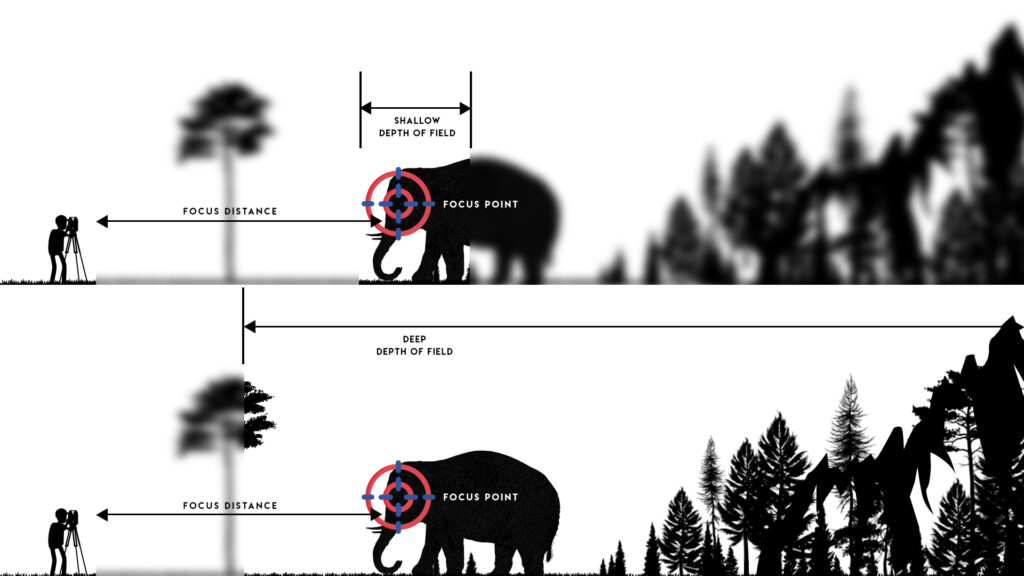
Depth of field is an important consideration when taking photographs, particularly in landscape, architectural, and portrait photography. A smaller aperture captures more objects in the photo and keeps the scene sharp. This will keep the camera in focus over a broader range of distances resulting in more areas of sharpness.
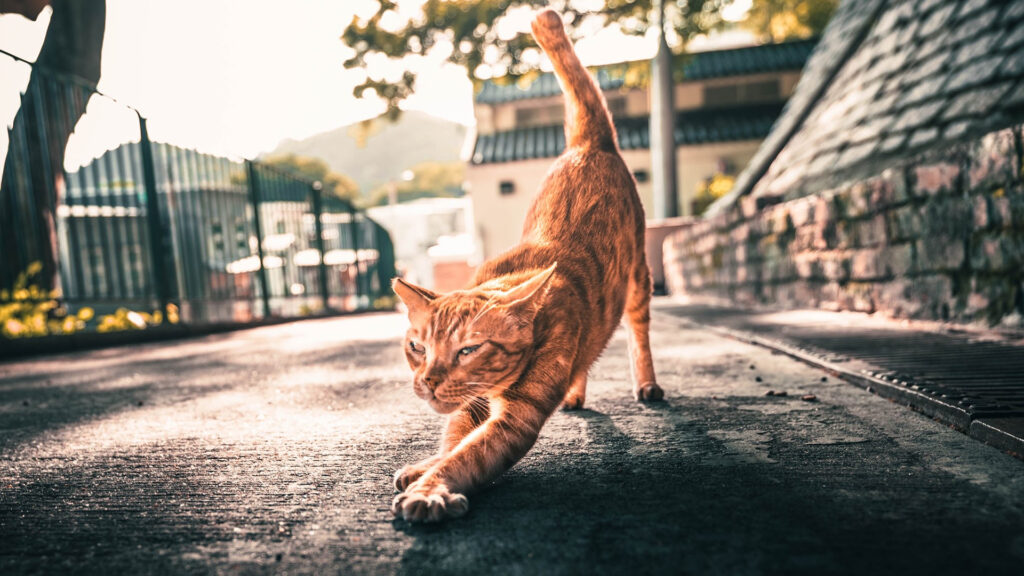
On the other hand, if you want the subject of your photo to stand out and the background to be blurred, you should use a wider aperture. By doing so, the camera will focus on the subject and blur the background, creating a stunning effect that is particularly effective when photographing portraits, animals, and plants.


The size of the aperture also affects your photo’s exposure as it determines the amount of light received by the camera’s sensor. A wider aperture is essential to avoid underexposing the photo when shooting in low light conditions. A smaller aperture in well-lit environments provides better exposure control and preserves photo detail.
To sum up, the aperture size plays a critical role in photography, affecting the depth of field, focus, and exposure of your images. Choosing the correct aperture size can help you take stunning, professional-looking photos that capture the scene’s essence.
Critical points:

- Aperture controls the amount of light entering the camera.
- It is measured in f-stops.
- The smaller the f-stop, the wider the aperture and the more light entering the camera.
- Aperture affects the depth of field, which refers to the range of distance that appears to be in focus.
Tips:
- A wider aperture (smaller f-stop) is ideal for low-light conditions.
Product suggestion:
The Canon EF 50mm f/1.8 STM lens is suitable for beginners with a wide aperture for low-light conditions. It is an affordable and versatile lens that produces sharp and clear images.


Canon EF 50mm f/1.8 STM
Pros:
- Affordable
- Wide aperture for low-light conditions
- Produces sharp and clear images
Cons: Limited focal length
3. Shutter Speed
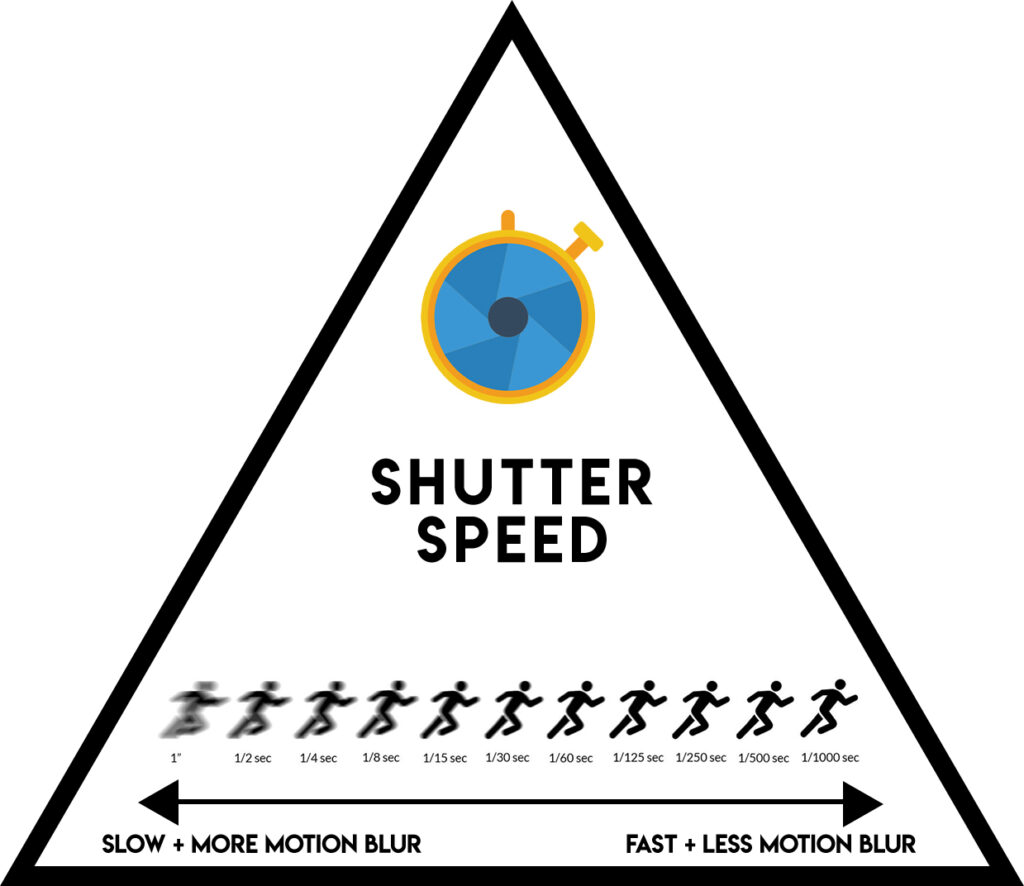
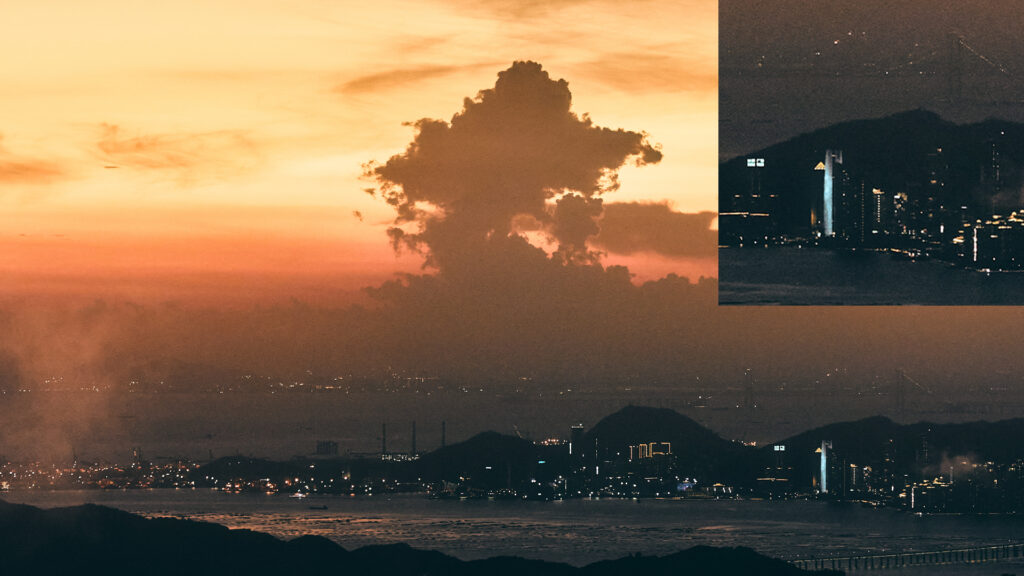
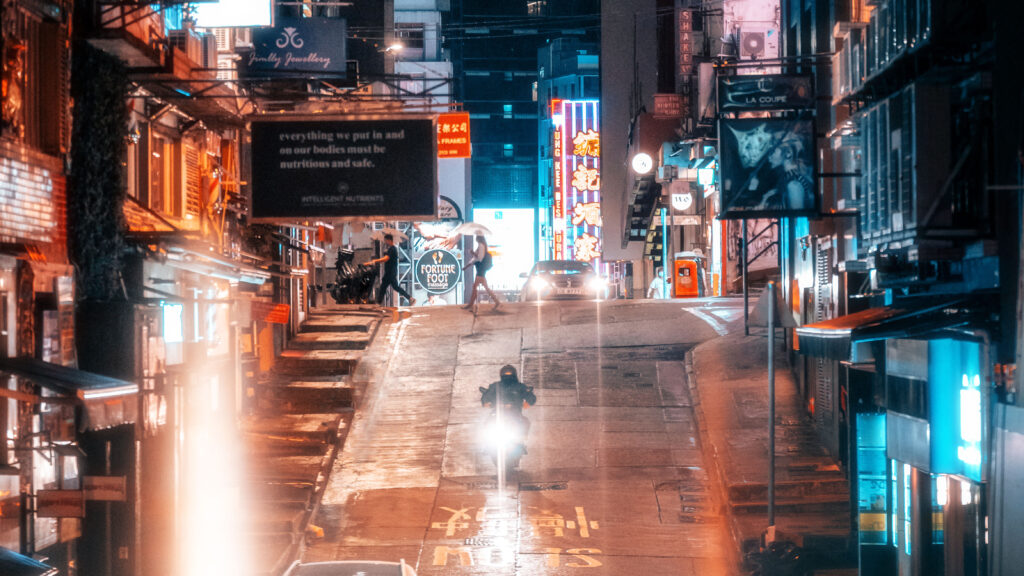
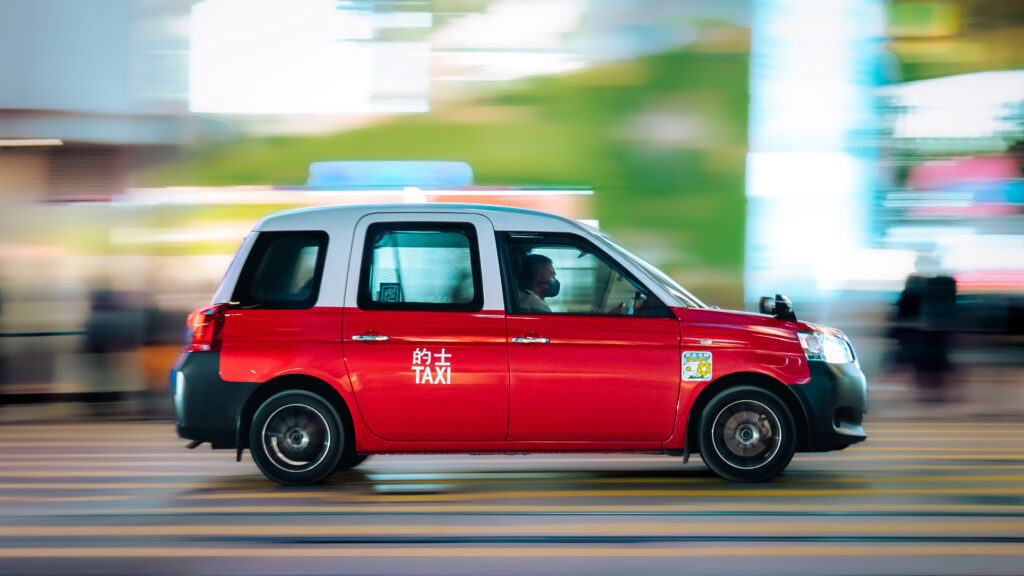
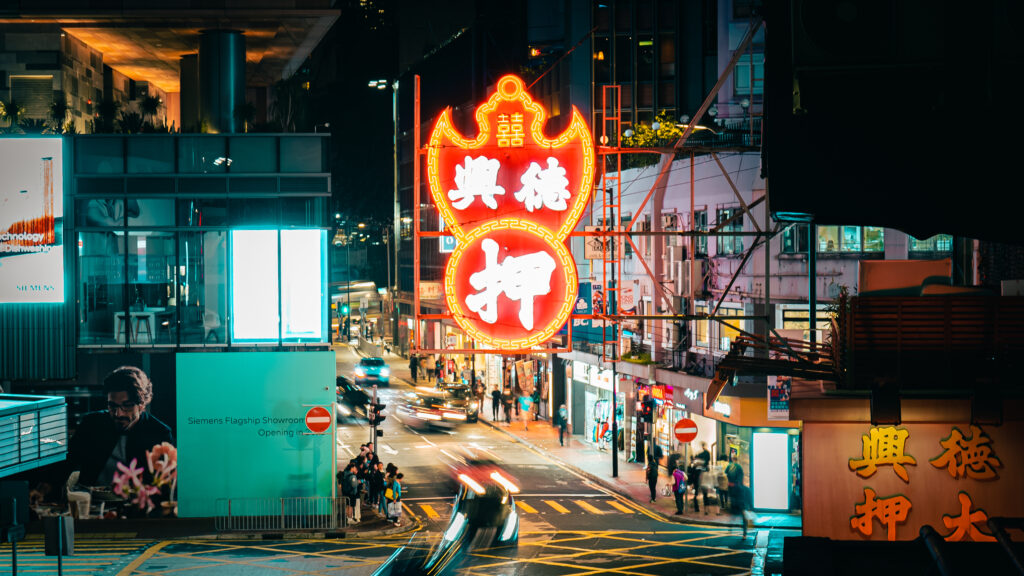
Photographers need to understand the importance of shutter speed in photography. While it’s commonly used in sports and night photography, shutter speed can also create artistic effects in photographs. Image: Slow shutter speed of waterfallFor instance, when photographing flowing water, a slow shutter speed can create a flowing blur effect, adding an artistic touch to the photo.
Photographers can also use shutter speed to capture momentary expressions and emotions, such as photographing children’s laughter and lively movements with a fast shutter speed.

When using slower shutter speeds to create the “long exposure” effect, keeping the camera steady is essential to prevent blurry images. A tripod or other stabilizing device can be used to achieve this.
Moreover, shutter speed can also be combined with aperture and ISO values to control exposure and depth of field in different lighting situations.

For instance, a slower shutter speed and larger aperture can be used with increased ISO value in low-light conditions to achieve proper exposure and clarity.

On the other hand, in a bright environment, a faster shutter speed and smaller aperture can be used with decreased ISO value to obtain more explicit photos.
Overall, shutter speed is an essential element in photography that can help capture momentary actions and emotions and create various interesting photographic effects. Photographers must deeply understand the application and principles of shutter speed to take more expressive and artistic photos. By mastering shutter speed, photographers can take their photography to the next level.
Critical points:
- Shutter speed refers to the length of time that the camera’s shutter remains open.
- It is measured in seconds or fractions of a second.
- Shutter speed affects how motion is captured in an image.


Tips:
– A faster shutter speed (1/500 or higher) is ideal for capturing fast-moving subjects, such as sports or wildlife photography.
A slower shutter speed (1/60 or lower) is ideal for capturing motion blur or low-light conditions, such as night photography or light trails.
Product suggestion:
A good tripod for beginners that is suitable for low-light conditions is the Manfrotto MT190X3 Aluminum Tripod. It is a sturdy and versatile tripod that can support heavy camera equipment, making it ideal for long-exposure photography.


Manfrotto MT190X3 Aluminum Tripod
Pros:
- Sturdy and durable
- Versatile and adjustable
- Suitable for low-light conditions
Cons: It may be heavy and bulky to carry around
4. ISO
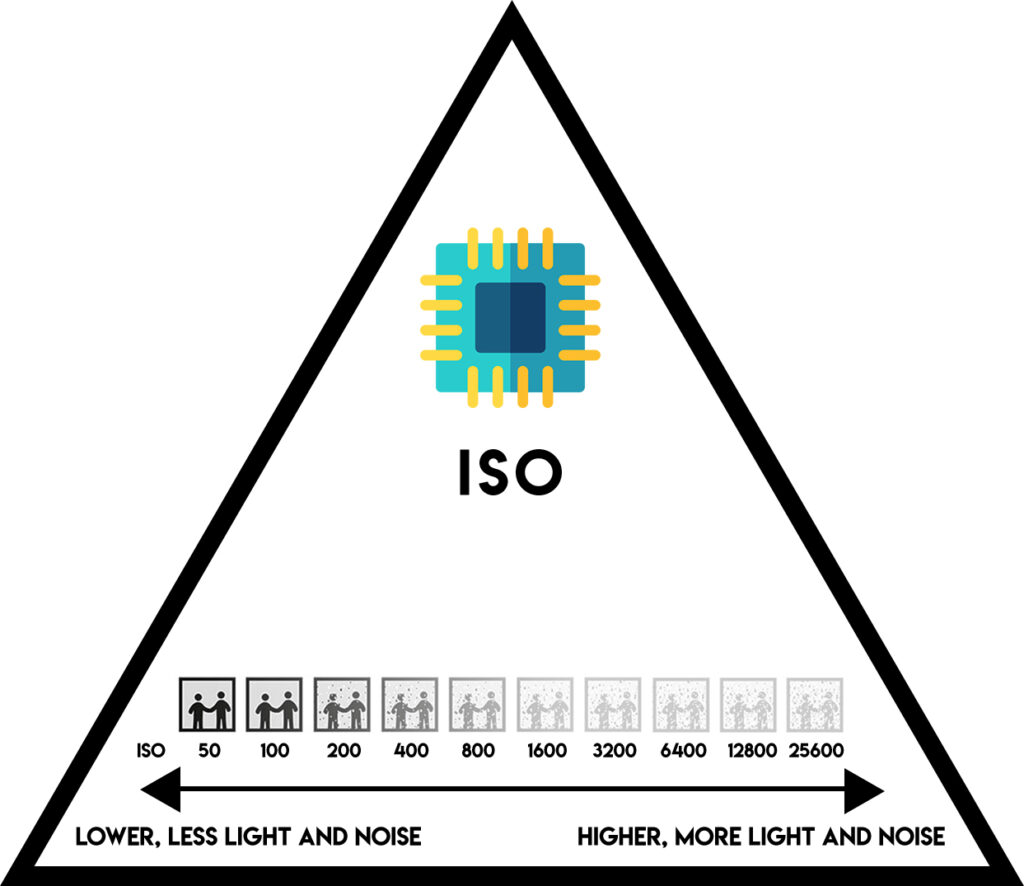
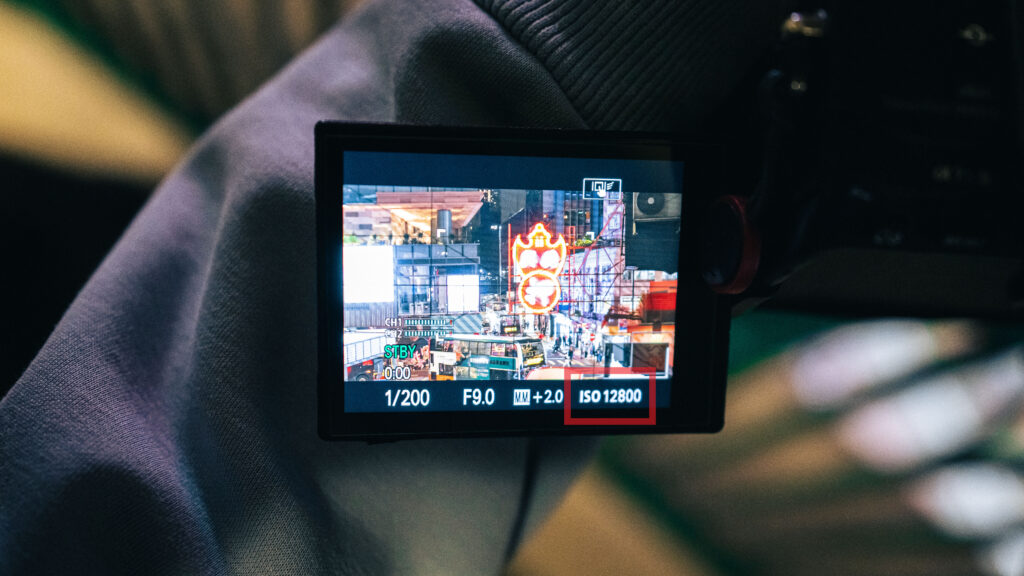
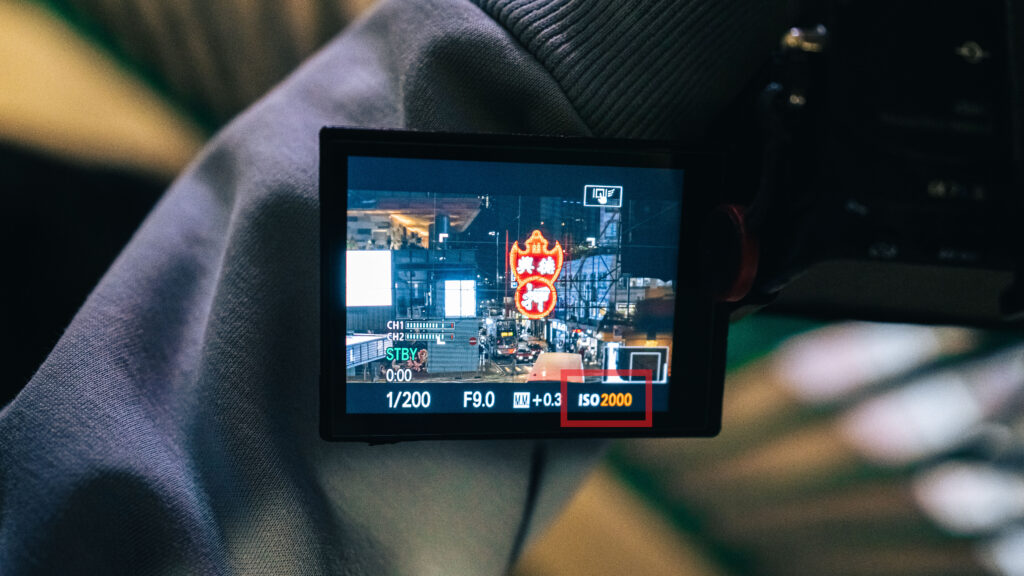
ISO is an essential aspect of photography that determines a camera’s sensitivity to light. A higher ISO value allows for faster shutter speeds and smaller apertures when shooting in low-light conditions. However, it can also lead to digital noise, which can affect the quality of your photos.

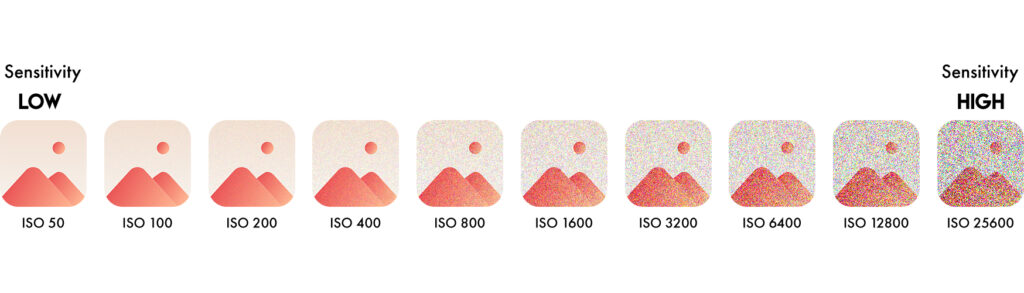
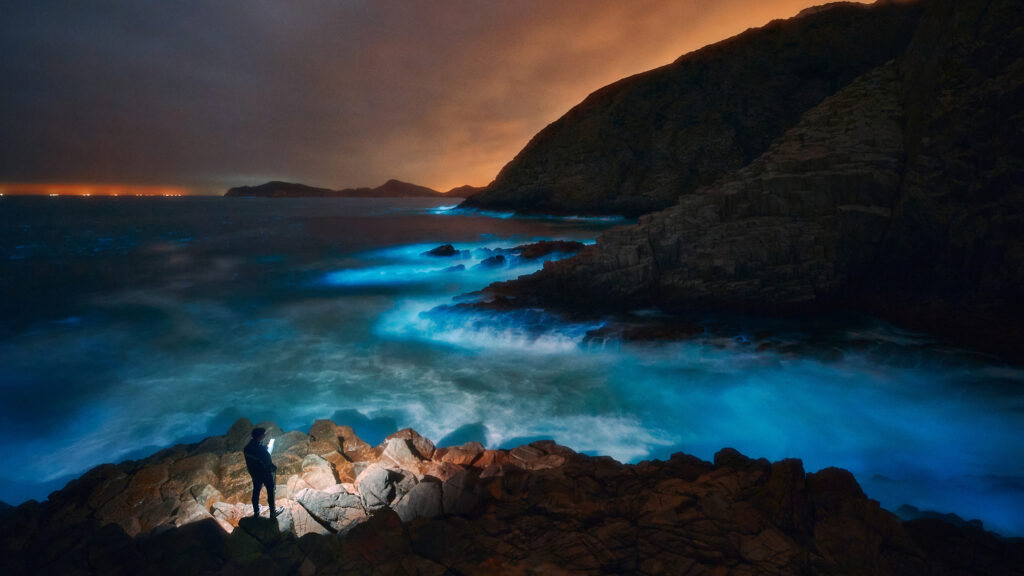
Adjusting the camera’s ISO value is crucial to capture more details and enhancing your photos’ natural look in low-light environments, such as night landscapes or indoor settings. But choosing the correct ISO value depends on the scene you’re shooting and the type of camera you’re using.
You can use a higher ISO value to capture more detail if you have a high-end camera. However, using a higher ISO value may result in noise and lower photo quality if you have an ordinary camera.
Understanding the basics of ISO values allows you to manage the lighting and take better photos easily. With the right ISO setting, you can enhance your photos and capture stunning images even in challenging lighting conditions.
Critical points:
1. ISO refers to the sensitivity of the camera’s sensor to light.
2. The higher the ISO, the more sensitive the sensor is to light.
3. A high ISO allows you to use faster shutter speeds and smaller apertures in low-light conditions.
4. A high ISO introduces digital noise, which can reduce the quality of the image.
Tips:
1. Start with a low ISO setting (around 100 or 200) in well-lit conditions.
2. Increase the ISO gradually in low-light conditions to achieve the desired exposure while controlling the digital noise.
3. Use noise reduction software during post-processing to reduce digital noise in high ISO images.
Product suggestion:
A good camera for beginners that offers good ISO performance and noise reduction is the Sony Alpha A6000 Mirrorless Digital Camera. Its maximum ISO of 25,600 allows you to capture sharp images in low-light conditions, and its noise reduction algorithms produce high-quality images even in high ISO settings.

Sony Alpha A6000 Mirrorless Digital Camera
Pros:
1. Good ISO performance
2. Effective noise reduction
3. Lightweight and compact
Cons:
1. Limited battery life
2. Limited lens selection
5. Exposure compensation

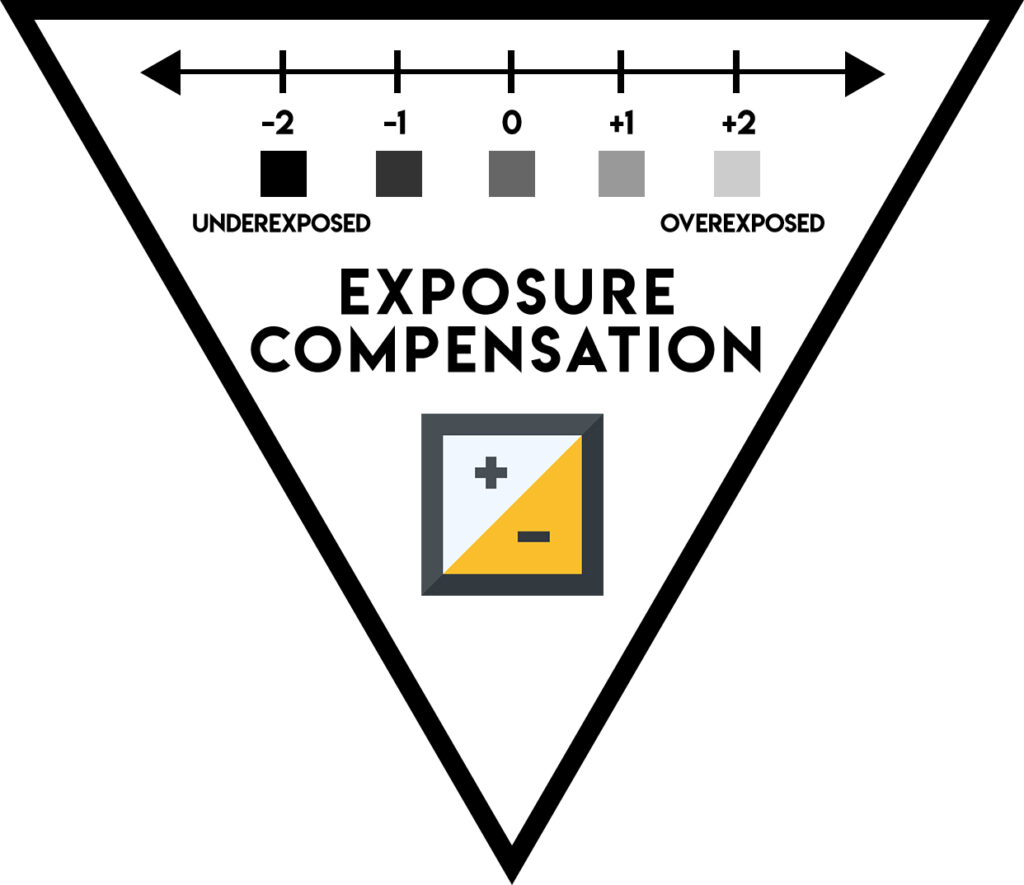
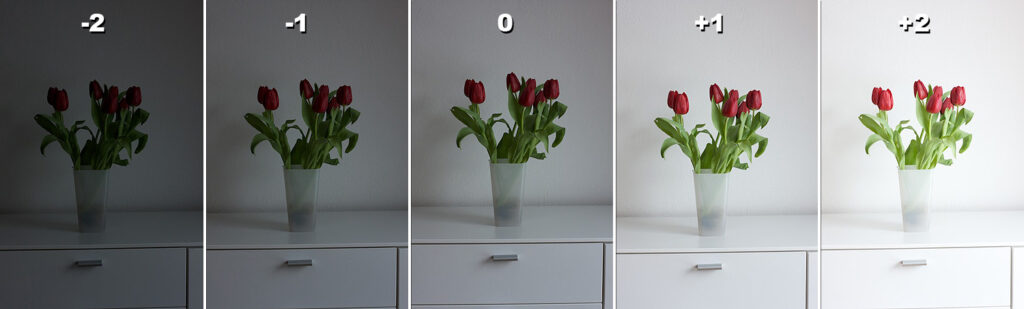
Exposure compensation is a technique that photographers use to adjust the exposure of an image to make it brighter or darker than the camera’s default settings. It’s a handy tool to have when shooting in tricky lighting conditions and when you want to have more control over the exposure of your images.
Photographers can achieve more accurate and consistent exposures and take stunning, professional-looking photos by using exposure compensation. Exposure compensation is typically set in 1/3 or 1/2 stops and can be adjusted easily on most digital cameras by using the +/- button. So, if you want to take your photography to the next level, learn how to use exposure compensation effectively.


Critical points :
- Exposure compensation is a camera setting that allows you to adjust the exposure level of your photos.
- It makes your photos brighter or darker than the camera’s automatic settings.
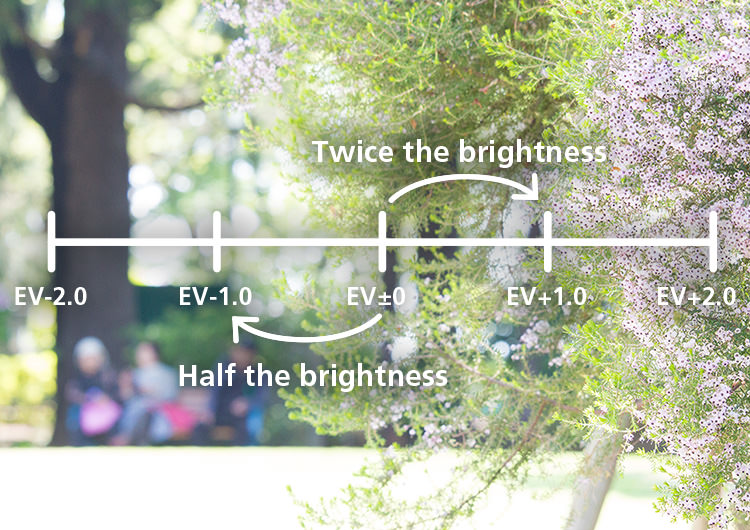
- Exposure compensation is typically measured in stops, and each stop represents a doubling or halving of the amount of light entering the camera.
- It is a valuable tool when shooting in difficult lighting conditions or when you want to achieve a particular creative effect.
- Depending on your camera’s settings, exposure compensation can be adjusted manually or automatically.
It is important to remember that exposure compensation affects your camera’s aperture and shutter speed settings. It may also impact your photos’ depth of field and motion blur.
Tips:
- Exposure compensation is beneficial when shooting in tricky lighting conditions, such as backlit subjects or high-contrast scenes.
- Exposure compensation can help you get more accurate and consistent exposures in different situations if you’re using a camera with a built-in light meter.
- When using exposure compensation, paying attention to your camera’s histogram is essential to avoid overexposing or underexposing your images.
- Experiment with different exposure compensation settings to see how they affect your images. Depending on the subject and lighting, you may prefer slightly underexposed or slightly overexposed images.
Remember that exposure compensation can affect the entire image. If you want to adjust the exposure of specific image parts, you may need to use other techniques, such as spot metering or post-processing.
Finally, remember that exposure compensation is just one tool in your photography toolbox. It’s essential to master other exposure settings, such as aperture, shutter speed, and ISO, to get the best results in different situations.
6. Conclusion
In conclusion, having a good understanding of exposure is crucial in developing your photography skills. It is essential to have a solid grasp of aperture, shutter speed, and ISO to manipulate the amount of light entering the camera and achieve well-exposed images. Additionally, incorporating exposure compensation can also be helpful in tricky lighting situations.
By adjusting the exposure compensation, you can further fine-tune the exposure levels and capture your subject in the best possible way. So, remember the essential concepts, recommendations, and product suggestions outlined in this beginner’s guide to getting started on your journey to becoming a better photographer.
Disclaimer
We want to be transparent with our readers about using affiliate links on our website. If you find our content helpful and decide to make a purchase through one of our affiliate links, we may earn a small commission at no extra cost to you. This helps us to continue creating valuable content for you. Thank you for your support!